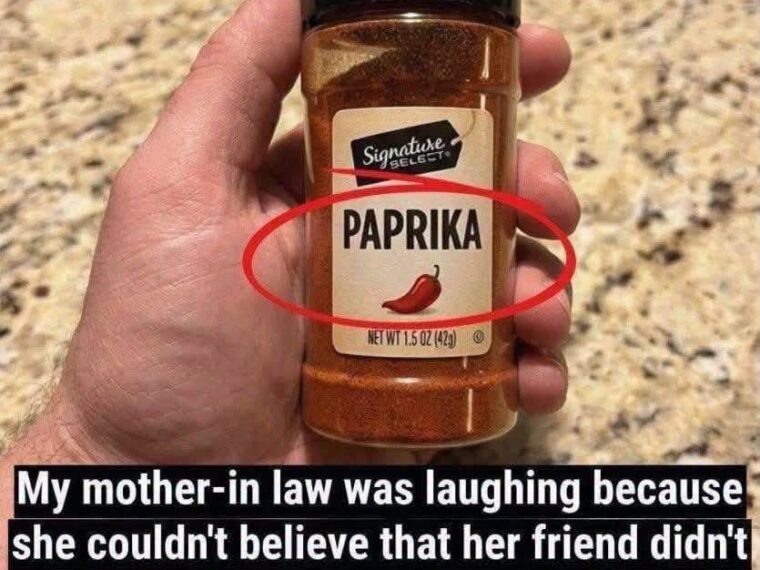
Paprika is one of those spices that looks simple but has a fascinating story. It is made from dried, ground peppers, usually varieties of Capsicum annuum. Depending on the type of pepper and how it is processed, paprika can be sweet, mildly spicy, hot, smoky, or even slightly fruity.
The good news is that making paprika at home is quite easy. If you have fresh red peppers, a way to dry them, and a blender or spice grinder, you can make your own paprika powder.
What Is Paprika Made Of?
Paprika is essentially dried red pepper that has been ground into a fine powder.
The peppers used for paprika are generally from the Capsicum annuum family, which includes many different peppers. Not all paprika is made from the same variety, which is why paprika can taste very different from one product to another.
The basic process is:
Fresh peppers → washing → removing unwanted parts → drying → grinding → sieving → storing
Some commercial paprika is made from the whole pepper, including the flesh and sometimes the seeds and internal membranes. Other varieties are made primarily from the pepper flesh, with seeds and membranes removed.
What gives paprika its color?
Paprika gets its beautiful red or orange-red color from natural pigments called carotenoids. Some paprika varieties are particularly rich in these pigments.
What makes paprika spicy?
The heat comes mainly from capsaicinoids, especially capsaicin.
Sweet paprika contains very little capsaicin, while hot paprika contains considerably more. This depends primarily on the pepper variety and which parts of the pepper are used.
Different Types of Paprika
Paprika isn’t a single flavor. There are several broad styles.
1. Sweet paprika
This is probably the easiest type to make at home.
It has a mild, slightly sweet pepper flavor and is mainly used to provide color and gentle pepper flavor rather than heat.
It works well in:
- Chicken dishes
- Eggs
- Potatoes
- Rice
- Soups
- Stews
- Sauces
- Roasted vegetables
2. Hot paprika
Hot paprika is made from hotter pepper varieties.
You can make it at home by choosing red chili peppers with more heat. The resulting powder can be used similarly to chili powder, although the flavor depends on the particular pepper.
3. Smoked paprika
Smoked paprika has a distinctive smoky flavor.
Traditionally, peppers are dried using smoke, allowing them to absorb that flavor before being ground. You can also make a homemade smoked version if you have an appropriate food-safe smoker or controlled smoking setup.
4. Mild or moderately spicy paprika
There are also peppers that fall somewhere between sweet and hot. These can produce paprika with a gentle warmth and more pronounced pepper flavor.
Can You Make Paprika at Home?
Absolutely.
You don’t need complicated equipment.
For a basic homemade paprika, you need:
- Fresh red peppers
- A knife
- A tray or drying rack
- An oven, food dehydrator, or another safe drying method
- A blender, spice grinder, or food processor
- An airtight container
The most important part isn’t grinding.
It’s drying the peppers properly.
If the peppers still contain significant moisture when you grind them, the powder can become clumpy and may spoil during storage.
The Easiest Homemade Paprika Method
For beginners, I recommend using a food dehydrator if you have one. If you don’t, an oven set to a low temperature can work well.
Ingredients
You can start with:
1 kg of fresh red peppers
The exact amount of finished paprika will vary considerably because fresh peppers contain a lot of water.
You can use sweet red peppers for mild paprika or hotter red peppers for spicy paprika.
For your first attempt, ordinary ripe red sweet peppers are a good choice because they are easy to handle and produce a mild, colorful powder.
Step 1: Choose Good Peppers
The quality of your paprika starts with the peppers.
Choose peppers that are:
- Fully ripe
- Red and brightly colored
- Firm
- Fresh
- Free from mold
- Free from major bruises
- Pleasant-smelling
Avoid peppers that already show mold or significant rot. Do not try to remove moldy sections and use the rest for paprika.
Very ripe peppers can actually be excellent for paprika because they generally have stronger color and a more developed flavor.
Step 2: Wash the Peppers
Wash the peppers thoroughly under clean running water.
Remove any dirt or debris.
After washing, dry them with a clean towel or allow them to drain well.
You want to minimize unnecessary moisture before the drying process begins.
Step 3: Remove the Stems
Cut off the green stems.
You can also remove the seeds and white internal membranes.
Whether you should remove them depends on the style of paprika you want.
For a mild, smooth paprika
Remove:
- Stems
- Seeds
- Most of the white membranes
Then use primarily the red flesh.
For a stronger or hotter paprika
You can leave some of the internal material, depending on the pepper variety.
However, remember that seeds themselves aren’t the primary source of heat. Much of the capsaicin is concentrated in the membranes and tissues surrounding the seeds.
Step 4: Cut the Peppers
Cut the peppers into smaller pieces.
For large peppers, strips approximately 1–2 cm wide are convenient.
You don’t need to chop them extremely finely because you’re going to grind them later.
The important thing is to make the pieces reasonably similar in size so that they dry at roughly the same rate.
Step 5: Dry the Peppers
This is the most important stage.
The goal is to remove almost all of the moisture.
You have several options.
Method A: Food Dehydrator
This is the easiest and most consistent method.
Arrange the pepper pieces in a single layer on the dehydrator trays.
Follow your dehydrator’s instructions for vegetables. A low-temperature drying setting is generally appropriate.
The exact time depends on:
- Pepper thickness
- Amount of water in the peppers
- Humidity
- Dehydrator temperature
- Number of peppers
It can take several hours or longer.
Don’t focus only on the clock.
Focus on the texture.
The peppers should become completely dry and brittle.
Method B: Oven Drying
If you don’t have a dehydrator, you can use your oven.
Place the sliced peppers on a baking tray in a single layer.
Use the oven’s lowest suitable temperature and allow the peppers to dry slowly.
Keep an eye on them because ovens vary considerably. You want to dry, not roast or burn, the peppers.
If your oven has a fan/convection setting, that can help move moisture away from the peppers.
The door should only be left slightly open if your oven manufacturer allows that and you can do so safely; otherwise, use the oven according to its instructions.
The peppers are ready when they are dry and brittle rather than leathery or soft.
Method C: Air Drying
In very dry climates, whole or sliced peppers can sometimes be dried naturally.
This can take considerably longer, however, and the peppers must be protected from:
- Rain
- Excess humidity
- Insects
- Dirt
- Mold
For home paprika, a dehydrator or controlled oven is generally much easier and more predictable.
How Do You Know When the Peppers Are Completely Dry?
This is extremely important.
Take a cooled piece and bend it.
If it is:
- Soft
- Flexible
- Rubbery
- Moist inside
…it needs more drying.
If it is:
- Crisp
- Brittle
- Dry throughout
- Easy to break
…it is ready for grinding.
Don’t grind peppers that still contain noticeable moisture.
Step 6: Let the Dried Peppers Cool
Once the peppers are completely dry, remove them from the dehydrator or oven.
Allow them to cool completely.
This is useful because warm dried peppers can behave differently during grinding, and cooling helps you assess whether they are genuinely dry.
If they become soft again after cooling, they weren’t dry enough.
Return them to the dehydrator or oven and continue drying.
Step 7: Grind the Peppers
Now comes the fun part.
Put the dried pepper pieces into:
- A spice grinder
- Coffee grinder used only for spices
- Powerful blender
- Food processor
Grind them until you get a fine powder.
Important tip
Don’t immediately run the grinder continuously for a long time.
Instead, use short pulses.
This helps prevent the powder from heating excessively.
Heat can affect the color and aroma of spices.
Step 8: Sieve the Powder
For a smoother paprika, pass the ground pepper through a fine kitchen sieve.
The fine powder falls through.
Larger pieces remain in the sieve.
Put those larger pieces back into the grinder and grind them again.
Then sieve again.
Repeat until you have the texture you want.
Step 9: Store Your Homemade Paprika
Put the finished paprika into a clean, completely dry, airtight container.
A small glass spice jar works very well.
Store it somewhere:
- Cool
- Dry
- Dark
- Away from direct sunlight
- Away from steam from the stove
Light, heat, oxygen, and moisture gradually reduce the quality of paprika.
Your homemade paprika will generally taste and smell best when used relatively fresh rather than being stored for years.
A Simple Homemade Paprika Recipe
Here’s the whole process in a compact form:
Ingredients
- 1 kg ripe red sweet peppers
Instructions
- Wash the peppers.
- Remove the stems.
- Remove seeds and membranes if you want a milder powder.
- Cut the peppers into thin, relatively even pieces.
- Arrange them in a single layer.
- Dry them slowly in a food dehydrator or low-temperature oven.
- Continue until the pieces are completely dry and brittle.
- Cool completely.
- Grind into a powder.
- Sieve the powder.
- Grind any remaining coarse pieces again.
- Store in a clean airtight jar.
That’s it.
How to Make Your Paprika More Flavorful
The pepper variety makes a huge difference.
If you use ordinary sweet red peppers, you’ll get a mild paprika with a pleasant pepper flavor.
But you can experiment with different peppers.
For example, you can make separate batches using:
- Sweet red peppers → mild paprika
- Mild chili peppers → mildly hot paprika
- Hot red chilies → hot paprika
- Different red pepper varieties → different flavors and colors
You can even blend different dried peppers after grinding.
For example, you could combine mostly sweet paprika with a small amount of hot pepper powder to create your own preferred level of heat.
Can You Make Smoked Paprika at Home?
Yes, but this requires an additional step.
Instead of simply dehydrating the peppers, you expose them to controlled food-safe smoke while they dry.
The traditional production of some smoked paprika involves drying peppers over wood smoke for an extended period.
At home, the important thing is to use equipment and methods specifically appropriate for food smoking and to follow its safety instructions.
Once the peppers are properly dried and cooled, grind them just as you would ordinary paprika.
The result can have a deep smoky aroma that works particularly well with:
- Grilled meat
- Potatoes
- Beans
- Eggs
- Stews
- Roasted vegetables
- Barbecue-style dishes
Paprika vs. Chili Powder
These aren’t necessarily the same thing.
Paprika is primarily ground dried pepper, and it can range from sweet and mild to hot.
Chili powder, especially the kind sold as a prepared spice blend in some countries, may contain several ingredients such as dried chili peppers, cumin, garlic, oregano, and other spices.
So if a recipe asks for paprika, replacing it with a chili powder blend can significantly change the flavor.
Why Homemade Paprika Can Taste Better
Commercial paprika is convenient, but homemade paprika gives you control over several things.
You control:
- The pepper variety
- Ripeness
- Sweetness
- Heat
- Drying method
- Freshness
- Grinding size
- Blending
Freshly made paprika can have a surprisingly strong sweet pepper aroma compared with an old jar of paprika that has been sitting in a cupboard for a long time.
Common Mistakes to Avoid
1. Not drying the peppers enough
This is probably the biggest mistake.
If moisture remains, the paprika may clump and have a much shorter shelf life.
Solution: Dry until completely brittle.
2. Drying at excessive heat
Very high temperatures can darken or scorch the peppers and damage their flavor.
Solution: Use gentle, controlled drying.
3. Grinding while the peppers are still warm
This can make it harder to judge the final dryness and may unnecessarily heat the powder.
Solution: Let them cool first.
4. Using moldy peppers
Don’t use peppers with mold.
Solution: Start with fresh, healthy peppers.
5. Storing paprika in a humid place
Moisture is the enemy of dried spices.
Solution: Use a dry, airtight container.
6. Keeping paprika next to the stove
The area around a stove is often hot and humid.
Solution: Keep your jar in a cool, dark cupboard.
How to Use Homemade Paprika
Once you’ve made your own paprika, you can use it in many dishes.
Try it on:
- Fried or scrambled eggs
- Roast potatoes
- French fries
- Chicken
- Fish
- Rice
- Lentils
- Beans
- Soups
- Tomato sauces
- Stews
- Roasted vegetables
- Homemade spice mixes
- Marinades
One of the simplest uses is paprika potatoes: toss potato pieces with oil, salt, paprika, and a little garlic, then roast until golden.
A Useful Trick for Better Paprika
If your goal is bright red, sweet paprika, don’t automatically choose the hottest red pepper you can find.
Instead, choose peppers that are:
fully ripe + strongly colored + naturally flavorful
For a hotter paprika, you can make a mild paprika base and then mix in a smaller amount of a hotter dried pepper.
This gives you much better control over the final heat level.
The Basic Science Behind It
Fresh peppers contain a large amount of water.
When you dry them, most of that water is removed.
What remains is a concentrated mixture of:
- Pepper carbohydrates and natural sugars
- Pigments
- Aromatic compounds
- Capsaicinoids, depending on the variety
- Fiber
- Minerals and other naturally occurring compounds
Grinding the dried material into small particles makes it easy to distribute throughout food.
That’s why a relatively small amount of paprika can provide a lot of color and pepper flavor.
Final Takeaway
Making paprika at home is much easier than many people expect.
The entire process can be summarized as:
Choose ripe red peppers → wash → cut → dry completely → cool → grind → sieve → store.
The most important rule is simple:
Make sure the peppers are completely dry before grinding and storing them.
Start with sweet red peppers if you’re a beginner. Once you’ve mastered the basic process, experiment with hotter peppers, different varieties, and eventually smoked paprika.
Homemade paprika is inexpensive, customizable, and a great way to turn an abundance of fresh red peppers into a spice you can use for months.